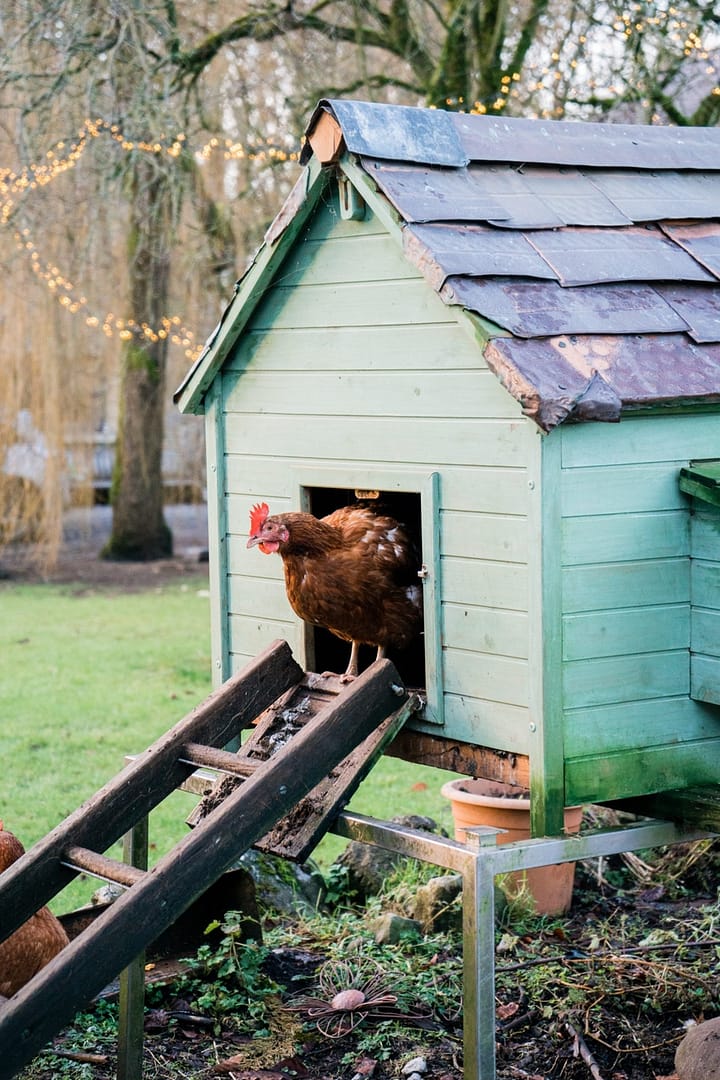
If you live in an area that gets below freezing, then you may want to consider providing extra insulation in and around your chicken coop.
While chickens are generally cold hardy and can take temperatures below freezing no problem (if they’ve been allowed to naturally acclimate to the temps), in extremely cold areas or places where the temperature change between day and night is extreme then your flock will benefit from some added protection.
If you’re worried about excessively low temperatures this winter and want to keep your chickens extra snug, here are some different materials and methods you can use to better insulate your chicken’s coop and run areas.

Ground Insulation
Chances are, you’re already using some kind or bedding or substrate on the bottom of your coop. Doing so helps keep your coop and your chickens cleaner, makes it easier on their feet, and helps absorb excess moisture.
Since heat rises, the ground can often be the coldest area. To help better insulate your coop in winter, it’s a good idea to add a couple extra layers of substrate on the ground. I personally, recommend using the deep litter method to provide extra insulation and naturally produced heat.
Common Substrates to Use:
- Straw
- Pine Pellets (dissolve in water into fine but compact pine dust)
- Sand
- Mulch
- Hemp
- Pine shavings
- Pine needles
- Leaves (mulched)
Each of these options has their own pros and cons. For example, while straw is great at insulating and relatively cheap, it tends to not be very moisture absorbent. Sand is heavy and doesn’t work great in raised coops but allows excellent drainage for wet areas.
You could just use one of these, or you could use a combination of them. In my run I like to use a combination of sand and pine pellets and in the coop I use hemp – It’s extremely moisture absorbent and is great at preventing smells (but is fairly expensive).
Deep Litter Method
Several of the materials mentioned above are excellent for using in the deep litter method. Pick 1 or more substrates and pile them up about a foot in your coop for the deep litter method. This method uses natural microbes and composting within a coop to absorb moisture, insulate, and create natural heat. Your chickens will naturally fluff up the material, but it’s a good idea to turn it yourself every other week or so.
Wall & Ceiling Insulation
The walls and ceiling of a coop are other areas that can benefit from some added insulation during cold months. This can easily be achieved by attaching different types of material to them which can help block drafts as well as keep any warmth in and cold out.
Here are a couple ideas, though I’m sure if you look around your garage you might be able to find other materials that you can use 😊.
- Traditional Insulators – most home improvement stores will have a section dedicated to different insulators for your home. Most of these could be used in a chicken coop just make sure the material is safe (don’t use fiber glass), and it’s best to have some kind of cover over them, such as a layer of plywood so the chickens don’t have direct access to the insulation. Ex: Foam, Reflective Rolls, etc. This option is more expensive than some of the other options below.
- Cardboard boxes – these make for a great temporary solution to your insulation needs (also one of the cheapest options). Make sure to remove any staples so your chickens won’t peck at them and accidentally eat them. You may also want to remove any tape just in case. You can line these up along the walls or even lay a couple layers on tops of the roof of the coop to provide some extra insulation. Just make sure the cardboard will stay dry. If your roof is not covered, then you could lay cardboard on it, and then use a weather-proof tarp on top of that.
- Old feed bags – recycling old feed bags is a great way to help add a bit of extra insulation to your coop. Since these are thin though, it’s best to add them with another insulation option such as cardboard.
- Wool – Sometimes you can find sheets of wool available for use in insulation. These will often come in large rolls but you might be able to find some scraps second hand from local contractors.
- Styrofoam – Styrofoam panels can also be used to line the walls of your coop. I recommend putting some kind of covering over them so that your chickens don’t eat them or make a mess. Only use the kind that holds together well, do not use the kind that falls apart easily.
- Old towels or blankets – If you have any rag towels or old blankets then these could also be used to insulate your coop. Nail them up up on the sides or drape over the top. Old moving blankets are also a great option.
- Bubble Wrap – Bubble wrap is a great option for insulation on windows. Bubble wrap allows light in while helping to keep out the cold.
- Plastic Sheets and Tarps – I tend to use these more around the run area, but they can also be used on the coop itself to help block wind from areas that let in drafts. They’re also great for keeping out rain and moisture if you get some especially windy days and sideways rain/snow.
- Wood – If you have extra panels of plywood or other wood materials you can layer these on the walls to provide extra protection.
- Glass / Windows – Another method that can help insulate your coop is by turning it into a greenhouse by adding old windows or glass panels around the outside. This doesn’t have to be anything fancy, just lining the outside with the glass and using clear tarps on the rest of the areas will do the trick.

A couple notes and things to consider when insulating the walls and ceiling of your coops:
- Make sure any additional insulation added to your coop is not covering up the ventilation areas. You want to maintain plenty of ventilation, even in winter, to help get rid of excess moisture, chicken dust, and ammonia.
- When covering the walls with material, make sure it’s not going to attract your chicken’s attention too much and be pecked apart by them. Staples can fall out or be pecked out so try to avoid using them if you can. Sturdy nails or screws or even heavy-duty tape will work for most materials.
- I do not recommend using traditional fiber glass insulation. It’s not safe to touch with your bare hands, so you definitely don’t want your chickens around it.
Bulky Insulators
Hay/Straw Bales – In general, smaller coops will retain heat better, so for larger coops it’s a good idea to go with some bulkier solutions. If you have a larger coop, or if you’re using a shed or barn to house your chickens then bales of hay or straw stacked around the sides are a good option. Keep in mind that straw and hay can sometimes have issues with bugs, mites, and mold. Add a little food grade diatomaceous earth and keep the bales as dry as you can to avoid these issues.
Snow – If you get large amounts of snow in your area, use it to your advantage! Pile it high around your chicken’s coop, making sure to pack it in and you’ll create some natural insulation for your chicken’s area. Basically, you’re making a chicken igloo. Just make sure you clear the snow away before it starts warming up too much or it’ll melt and leave a soggy mess.
Dirt – Kind of like what can be done with the snow. If you have extra piles of dirt laying around (some people do right?) then you can pile it up around your chicken’s coop for added insulation. This is a trick that gardeners, especially those that dabble in permaculture, use to be able to grow in colder climates. With both dirt and snow options, try to aim for at least 1-3 feet deep and tall to create enough insulation.
Leaves – Mulched leaves are great for adding insulation to the floor of your coop or run, but you can also pile excess yard leaves up along the sides to provide some protective insulation. I like to rake leaves up to about 2-3 feet along the sides of my chickens run and it definitely helps with blocking wind and adding some extra insulation. The chickens enjoy pecking at the leaves as well.
Logs – If you have had a tree cut down or keep logs for firewood, then these can also be used to stack up around your chicken’s pen to create some extra weather protection.
Bags of dirt/mulch/sand – If you’ve got bags of mulch etc on hand for a project that you never got to, then these can be used to line a chicken coop or run as well.

Weather Blockers for Wind & Rain
Cold wet from rain and melting snow along with winter winds often causes the most damage when it comes to severe winter weather. If your coop and run are completely covered with a roof, then you’re probably already able to keep out most of the elements. However, with some severe storms and strong winds covering up the sides of your chicken areas with extra protection is always a good idea.
- Tarps – clear and colored tarps are readily available at home stores. They often already come with holes punched in them, but you can also cut holes in them it needed and attach to your coop/run with zip ties.
- Shower Curtains – Cheap shower curtains make for a great alternative to tarps (some of which can be expensive). Shower curtains will only have holes at the top, so you’ll need to cut a couple extra holes in them to help you attach it. Or you could weight the ends down with bricks or rocks etc.
Other Insulating & Heat-Producing Options
Compost Piles – If you’ve ever composted, then you know that compost piles can produce a lot of heat. The ideal internal temperature for a compost pile is usually about 150 degrees Fahrenheit. This temperature kills off bad pathogens and allows the good microbes to do their work breaking down the material into usable dirt.
Some gardeners will use wood pallets to make temporary compost piles inside of greenhouses etc. As the compost pile gets built up, it will produce ambient heat.
You can use this option with your chickens either in a large coop or in their run area, just make sure the compost pile is protected from them otherwise they’ll tear it apart. Layer about 50:50 green and brown matter, keep moist, and turn it every now and then.

Green Roof – Green roofs are not very widely used, however, they’re a popular concept when it comes to eco-friendly options of greening up city areas and creating natural insulation. All a green roof is is a roof that’s been layered with well-draining dirt and then been planted with grasses, succulents, or other plants.
In summer a green roof will keep a house cooler and in winter it will insulate and keep a house warmer. Usually these need to have a slant for water run off and will generally have a waterproof liner as the base to protect whatever is underneath from moisture. One problem with green roofs is they can be fairly heavy, so you only want to do this on a structure that can take the extra weight.